Thursday, June 30, 2011

banana bread for your homestead

Obviously by the title of this blog - I love banana bread.  I don't know about you, but we are guilty of over buying produce (example : bananas) and then not making it until it comes to "Shit! We have to use this stuff."
That's why I love this recipe.

You need the bananas to be mushy, black (sans mold) and over ripe.

When I wasn't working as much I used to make it all the time, but I haven't in a while...until I noticed  our fruit bowl was full of over ripe bananas.

BONUS: This week we are traveling to Corolla, NC.  If my snack can brave LaGuardia Airport and TSA without getting (too) smashed - we can all enjoy.

There are a million alterations to my original recipe.
Here are some yummies to add
Berries, a coffee cake crumble top (see bottom), nuts, dried chopped apricots, chocolate chips, raisins... or (if your feeling daring) all of the above.  For this particular batch I am going tame because I am not sure if any one has nut allergies, etc...


Banana Bread (for your homestead)

2 cups all-purpose flour (I use whole wheat!)
1 teaspoon baking soda
1/4 teaspoon salt
1/2 cup butter
3/4 cup brown sugar
2 eggs, beaten
2-3 Overripe smashed bananas

  1. Preheat oven to 350 degrees F. 
  2. Lightly grease a 9x5 inch loaf pan.  Or use these- they make individual little loaves and cook faster than the hour cook time- if you have a toaster oven and use these they will only cook in 45 minutes- The previous two were tips from my Bubbie (yiddish for grandma) sometimes Bubbies know best when it comes to baking...but shhh don't tell them!
  3. In a large bowl, combine EVERYTHING!  You will get an arm work out.  I personally like chunks in my b.bread but if you don't - beat the eggs, sugar and bananas in a separate dish until it's smooth, then combine everything.
  4. Bake in preheated oven for 60 to 65 minutes, until a toothpick inserted into center of the loaf comes out clean.
  5. Let bread cool in pan for 10 minutes, then turn out onto a wire rack.


For a nutty coffee cake crumble on top
1/4 cup all-purpose flour
1/4 cup sugar (i like mixing white and brown for this)
1/4 cup chopped almonds
1/4 teaspoon vanilla extract
2 tablespoons cold butter
Teaspoon of Cinnamon
Add ingredients together and fold, you want a lumpy consistency, you have to use cold butter to obtain the lumps... Crumble over batter in pans and bake as directed above.


enjoy.


Update: Banana Bread was successfully transported and made a great addition to an early morning snack before fishing, it didn't last past day one.

Monday, June 27, 2011

flea markets and rainbows

My fiance traveled to NC early leaving me to my own devices this weekend.  Saturday was filled with retail therapy and some much needed playing/writing.  Gay marriage is now legal in NY! Yes!
Sunday was a wonderful and colorful day!  My bestie Lucy and I went to NYC to go flea-ing and to celebrate at the Gay Pride Parade.  It's such a special moment in the LGBT community, not to just be just recognized but to be able to receive an actual marriage licence.  I am straight, but I still celebrate for my friends in the LGBT community.

On a funny note side note people thought we were lesbians.

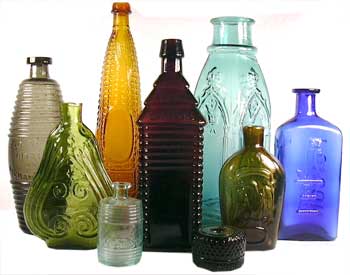
Before and after the parade we did some lovely flea-ing in the hells kitchen area.  GOLD MINE!  As indicated before, I am searching for old clear and colored bottles for our centerpieces.  I got some really beautiful ones, but I did sadly pass on cobalt blue bottles (25 for a bottle that had no writing!!!? NON-negotiable, really?!)  I love those expeditions in the city, especially with Lucy- she gets it, no one else (except my mom maybe) would wander around for HOURS and hours looking and digging through odds and ends. 

After wards we went to a cheerful Mexican food restaurant and split Guac, Nachos, and Ceviche... Not to mention a large pitcher of Sangria.  The colors reflected how, not just us, but how everyone around us was feeling... bright, festive, jubilant, and gay.


Tuesday, June 21, 2011

summer blues

... that make me happy!


Blue Skylines


Blue toes


Wedges I bought for a steal...
in store for half the price listed on site.


Perfect temperature water


Navy pleated chiffon skirt
-bought on clearance for 19 in store. (doesn't this skirt beg to be paired with a crisp sleeveless blouse, red pumps and a swipe of red lipstick? America the beautiful indeed).


Blue Berries

Thursday, June 16, 2011

three

 I enjoy a drink, or two (three) after work, and on weekends, and any other time.  I really love to collect the bottles.  For our centerpieces for the wedding (we are going sans-florist) we are going to use various collected bottles with flowers such as Queen Anne's lace (one of my favorites), poms, and statice (amongst others).  St. Germain Bottles are the best.  After boiling them, using a steel pad to scrub off the labels, and snipping the metal ring once attached to the screw top, they are quite pretty with one cut flower from the garden.

Case in point...
1.


This is definitely on the list of crafts.
2.


3. All the pretty colors.


Wednesday, June 15, 2011

Deterrent Tea

You can see my previous garden post here, but as you know my sunflowers have been getting chomped on lately.  Unacceptable, but I didn't want to use a pesticide on the sunflowers because I plan on harvesting their delicious seeds.
I researched and found a recipe for an all natural pest-deterrent made from items you may have in your kitchen already.  I altered the ingredients because I was lazy and didn't want to run to the store, but it still works.

Word to the wise, you will need to apply it every 2 days, or more if it's been raining, because it washes away.

  
You'll need..
  • Food Processor/ Blender
  • A pot with lid
  • Spray Bottle
  • Bowl
  • Spoon
  • Fine Strainer/ Cheese cloth
  • 7 cups of water
  • 3 whole garlics
  • 1/2 cup of red pepper flakes
  • 2/5 cup of Chile pepper
  • 2 Table Spoons of Vegetable oil
  • 2 Table Spoons of ALL NATURAL UNSCENTED laundry detergent
  1. Peel and chop your garlic using 1 cup of water.
  2. Strain the garlic to get as much juice out of it as possible.
  3. You might want to process it again after the first round of straining by adding another cup of water and pressing on the strainer with a spoon to juice the garlic.  Set aside juice.
  4. Put the garlic remnants aside.
  5. Add the Pepper Flakes and Chile Pepper to the remaining 5 cups of water. 
  6. Bring the Pepper Tea to a boil, remove from heat, and let stand for 30 minutes.
  7. When the Pepper Tea is cool strain it and add it to the garlic juice.
  8. Add your strained pepper flakes to your discarded garlic bowl. optional:
    I scattered the discarded pepper flakes and garlic around my sunflower garden to emphasize the smell.  It didn't look so pretty so if you're worried about aesthetics I would skip this part.
    To make this mixture stick to your plants we need to add 2 tablespoons of vegetable oil and 2 tablespoons of ALL NATURAL UNSCENTED laundry detergent.  I emphasise all natural and unscented to A. Be okay for the environment B.Not to be scented to attract any critters.
  9. Spay frequently ( I spray every 2 days or after it rains)  your mixture will coat the plant with a reddish tint. 
SOME FAQs
Will it make my produce/seeds spicy?
No (unfortunately) it will not, it washes right off.
Will it stain?
It will stain your clothes, I sprayed this mixture on my strawberry plants (with white flowers) and they only a rainshower away from being white again.
Will it harm my young plants?I put it on young seedlings (1-2 inches) and they have been just fine.

FYI- This stuff is spicy, don't rub your eyes!! (before adding the soap/oil) I tried a finger dip, it was HOT for me and I adore spicy...I'm rethinking this as a marinade for hot wings.


UPDATE!
It's been 2 weeks since I applied this mixture and I have noticed that the ants have left my plants alone as well as caterpillars and groundhogs.  I hope the plants bounce back from their chomp!  I have also sprayed the mixture on my strawberries and the squirrels have left them alone too.  I even use them on my tomato plants.

I have begun a replacement crop for my sunflowers on my fire escape/ terrace and plan to replace the badly damaged plants.  I am also going to fence in the sunflower bed, that's one of the next DIYs.

Tuesday, June 14, 2011

mason jar meet insecurities, mason jar meet shelf.

I have this tendency (as most creatives do) to begin one project and then another and another, before completing the initial one.  Case in point- spring of 2008-summer 2010 I went through a songwriting burst.  I had plenty of new material brief time line: finished audio tech school in Nashville- moved from Nashville after a year of working in the recording industry scene- dealt with heartbreak on a few levels from love, money, career, ego- to Bergen co. NJ to work in the NYC recording scene- ended a long relationship- worked like a crazy person- left the fancy NYC recording studio- fell so much in love- moved in together- worked in schools teaching music to young (-5) children- started my own business (UpBeatBaby music classes)-started working at an undisclosed  company that I really love that has nothing to do with with music but gives me the people interaction i crave- getting engaged- planning wedding. :wipes sweat from brow:

Like I said before the re-cap, I had a ton of new material, the means/know how/ equipment to record, master, and release an album...At the peak of playing shows, featuring shows, writing, recording, shooting an album cover etc... I completely threw myself into starting my business and left my quasi completed recordings in Protools (recording program) at static levels.

After starting my business and going through the first sessions, I was proud in once sense but secretly disappointed in my flighty-ness and asked myself why I turned my back on this project.  I never stopped playing and writing, but I did stop working on the album. 

Instead I played Beatles's songs, and wrote kid songs that took all of 10 minutes, made instruments, sang and danced - encouraging our UpBeatBabies to explore their creativity and musicality, at the same time I had shelved mine...

What a hypocrite, right?

Recently on a car ride with my fiance (the type that you end up talking about random thoughts left stagnant in the mind).  I started to tell him that I want to restart the album project.
With that finally! look he told me something that I already knew, never shared, and needed to hear.

I had stopped, yes in part to starting UpBeatBaby, but because I didn't believe in myself.  I can write songs, I have always been received warmly on stage, I've had many nice compliments from people that have been in the scene for a long time... but I always discounted it, and shrugged it off.

During the recording process I scrutinized to the point that I would do and redo, again and again, over and over again, thus accomplishing nothing.  I did record some roughs. But was in the process of redoing those for the "finished project"- still in my hard drive.

This is a pattern, I recognized it in audio school too.  As the only young woman in my class I was very quiet, kept to myself, and barely did projects with a partner (which we were supposed to do, but I always found a loop hole).  But as the girl from Jersey, I was usually very out going and loud.   God forbid the question "Do you play?"  "er. yea. a little.

I discounted myself.

I submerged myself in the gear and tech side, and rarely played any music to anyone.  When I had a few I'd jam with a group, but only after a few, and only this that and the other thing....

I will never forget this...The last week of me being in Nashville one of my friends from school stopped over to wish my luck and say good bye.  In the house full of boxes in the middle of the mess that was my life at the time, he saw my keyboard and asked if I would pleeease play a song.  He had never heard a song, I grumbled "alright"- At the time I really hated playing in front of "a" person, it was too intimate for my comfort zone.

After the first song (I think I played two)
It was the strangest reaction  I had ever received, he was still, quiet, laughing and shaking his head, and making sounds like, puh, uhh, whaa...he was shocked and REALLY pissed off that I had withheld.  He was/ and still is to this day, especially when I said I'd send him tracks when I got settled in NJ...
but never did.  sorry man.

Fun fact... I had secretly entered a songwriting contest via YouTube, my video went over by 1 second and by the time I got the email disqualifying my song and urging me to submit a 1 second shorter one... it was due the day before... oh well.  It remained on you tube until I met my now fiance. 

The first time I cooked for him he quoted that submitted song, trying to be cute and coy, he was received by a reaction he definitely didn't expect... I thought I had subconsciously plagiarised some unknown poet or song, I was fuming inside over that line, I couldn't wait to tear up the verse and re-write...

Little did I know he had looked me up and found that song on YouTube and memorized it.  We laughed it off and after dinner I brought him into my music room and played for him.  I had never done that before and have it feel so right.

He really encouraged me to do open up, he got me to do my first Open Mic night in NJ as a Valentine's Day present for him (I'm a sucker, no?).  Together we went full force in it for months and months, and then... it. just. stopped.  He questioned but accepted my (b.s.) decision.  Until that car ride.

"I believed in you, more that you did."  I'm lucky enough to have some one who does, some aren't.

I really hate to disappoint.

I think I'll make a mason jar and stick my insecurities in there, and them keep them on a shelf... that's where they can stay.
Sunday, June 5, 2011

Eggplant Farmer Johnny


I enjoy cooking and baking things I never have before.  But not nearly as much as I enjoy making family recipes.  From my Mom's famous biscuits and gravy, my Bubbie's Garlic Baked Salmon, my Great Grandmother's Kasha Varnishka, or my Aunt's Eggplant Parmesan (there are many, many, many more from these matriarchs that I cannot wait to share) it's nice to share memories though recipes while making new ones with all the important people in my life.  I haven't had my aunt's version in many years but it was so good that a second (and a half) portion was sometimes necessary.
This particular recipes is from my Aunt's Eggplant Parmesan-but we always called it Eggplant FarmerJohnny
1 Large Eggplant (1lb)
1 Jar Tomato, Garlic Basil Sauce (no Ragu, that stuff is gross) and a sauce pot
2 Eggs
Mozzarella Cheese
Plate of Bread crumbs (Italian Style)
Plate with paper towels to absorb oil from eggplant
Seasoning- Garlic powder, onion powder, oregano, salt, pepper, and a drop of sugar (to counteract the sometimes acidity of the tomato sauce)
Garnish with Garden Basil
Cooking oil (the sliced eggplant should be floating in the oil, but don't overdo it)
Large frying pan
Oven preheated to 350
Preheat oven to 350.
After washing your eggplant lay it on it's side and slice no more that 1/4 inch thick circles.  Leave the skin on.
Beat 2 eggs in a bowl large enough to accommodate quite a few eggplant slices.
Pour breadcrumbs into a plate, little by little that way you don't waste breadcrumbs.
At this time pour cooking oil (canola, vegetable, olive oil whichever your choice I use veg.) into pan and heat on high.
Also, put tomato sauce on low-med heat to warm while you're frying and add seasoning to taste.
Dunk the eggplant slices into the egg.
Bread the eggplant and set aside ( *DISH SAVER- I use the edge of my breadcrumb plate to save on dishes and stack it tall!)
Fry the slices until golden brown on each side.
Place them on plate with a paper towel in between each batch.
After frying follow this order of assembly.
Sauce-Eggplant-Sauce-Cheese-Eggplant-Sauce-Cheese continue with cheese ending.
Garnish with fresh basil from garden or grocery.
Heat in oven for 20 minutes or until cheese is melted.
This step is optional- for that browned cheese I switch to broil setting for 3-5min on 350.
Mangia!

Friday, June 3, 2011

...how does your garden grow?

As promised, here are current pictures of my garden.  Please excuse the dried grass in the garden (my landlord mowed the lawn and left me to clean up...thanks?), that will be this weekend's project.  I learned a few things.
1. Rose bushes like to be cut before spring season, I did this and It BLOOMED there are tons of gorgeous playboy roses. Compared them to last year here.
2. Don't expect your bulbs all come up, my ranunculus did, but not my tricyrtis, I'm still hoping for next year.
3. Learn what poison ivy, oak, and sumac look like, this year (thus far) I've managed to rip it up, and not get it... last year over the course of a summer I was lucky enough to get it 3 times.
4. Weed your garden a little bit every 2 weeks, it keeps it looking fresh and doesn't make it confusing when bulbs are coming up.
5. PLAN your space, I read this in Martha Stewart's Living (one of my favorites), I didn't do this and before I knew it I was planting two many conflicting plants.  Rule of thumb, high growers in back, to low in front, this year I have a hodgepodge because of my travels and randomly picking plants I see and like.  From the garden store to (admittedly) pulling over on the side of the highway for wildflowers that I MUST have.  Really, I did this 3 weekends ago and love my purple flowers  that I dug up and transplanted in my garden.  Word to the wise: Don't be greedy ( I only took 2 plants), and don't transplant flowers that aren't native- you don't want an invasive species in your backyard.  To put it lightly I am going to have to transplant and replant next year to get things in order...at least I'm learning right? RIGHT!
 6. LOOK FOR GREEN OPTIONS... I know it is frustrating when you have a garden being eaten away by something... just ask my sunflowers.  I was going to spray pesticides but if I am going to harvest and eat the seeds later, I don't want to.
I am going to brew a Garlic Pepper tea to spray on my plants, I got the recipe here.  I can't wait to try it this weekend!

Thursday, June 2, 2011

Three.

1. Dutch Tulip field from afar.

2. "The" Perfect Engagement Photo (see next post)


3. My Pride and Joy of my garden this year...Columbine Flower.


The "Perfect" Picture

(Still not turning this into a wedding blog I swear) But it's so damn hard to take "THE" picture... You know, the one that will be printed on the magnet for "Save the Date"... that magnet will then be on your mother's, grandmother's (and don't forget in law's) fridge long enough for your first kid or two, to be born and out of diapers.
Case in point, 2 weekends ago we went to book (whoo hoo) the place for the wedding.  It's a charming vineyard in Upstate, NY about 1.5 hrs away from NYC- Millbrook Vineyards.  After we went through particulars we decide to set up the tripod and take a few shots, between the hair in my lip gloss, and my crooked tripod set up that resulted in my fiance looking like the leaning tower-they were not keepers to say the least, don't worry I'll post them after I load the trillion that exist.  We most definitely won't be using them.
Here are some ideas that I love.


 I could never convince Steve to do the above one with me. He HATES posed, hence the reason I am setting up my camera/tripod and shooting a bunch with a timer, he stiffens up when it comes time to take pictures.  They may be posed...but I think these are too adorable. 
If it were up to him he'd use the one of us (me seasick) on a fishing boat at 7am last year.  We got some great shots of my "chumming" overboard.  I will eventually (after we send out "The" picture) post what we decided on.

and some that I loathe.

 
Hello easy listening the beach version. 

 
Why not an actual article in wedding magazine/blog, or even an announcement in your local paper?  Why of all magazines... would you choose OK!?

As promised here are 3 of the most decent shots...FAIL.
Which leads us to...


Related Posts Plugin for WordPress, Blogger...